Adding or Changing Text using Divi Builder
Changing or adding text to an existing text module
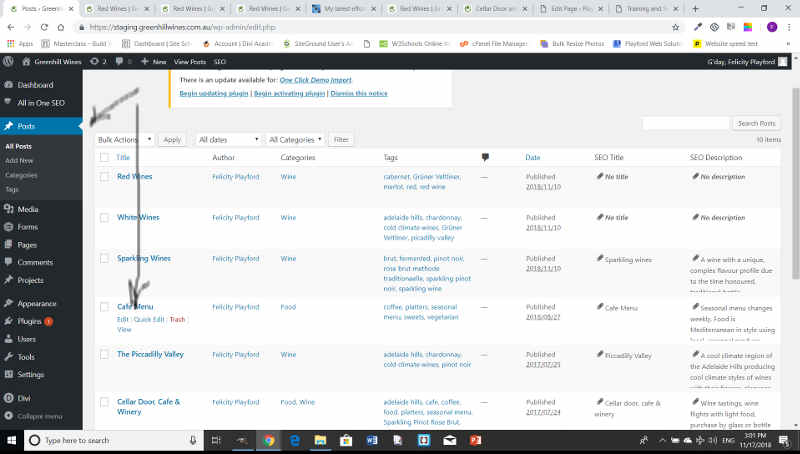
- Open the page, post or project that you want to change.
- Scroll down the page past the SEO content until you get to the the Divi Builder section.
- Select the module that you want to change the text in by clicking on the hamburger menu.
- Change the text in the Content Box. Remember to use Headings and paragraph text only.
- Select the Save and Exit button to save the module settings
- Select the green Update button on the right hand side to save the page.
- Check the page to make sure the changes are what you wanted.
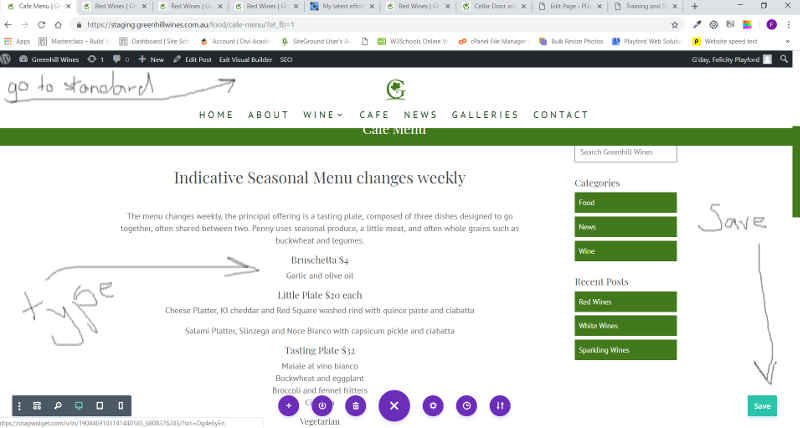
Adding or Changing Text using Visual Builder
Changing or adding text to an existing text module using the Visual Builder
- Open the page, post or project that you want to change.
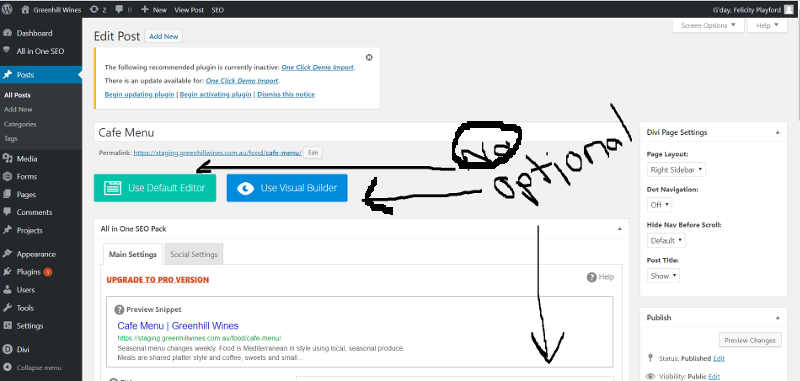
- Select the Blue “use Visual Builder” button (shown in top image on this page)
- Scroll down to where you want to change the text on the page.
- Click the cursor and change the text until you have made all the changes.
- CLick on the round blue button which is in the middle of the page at the bottom.
- Click on the Green rectungular ‘save’ button which is in the bottom right hand corner.
- Check the page to make sure the changes are what you wanted.
Adding a New Text Module
- Open the page you want to add your text to.
- Go to the part of the page that you want to add a module to.
- Select Insert Module
- Select Text Module
- Follow steps below.
Adding Images to the Media Library
Step 1: Insert the images into the media library.
Make sure you have named them properly
Names need to be:
- all lower case
- no spaced between words (use a _ or a – but be consistent)
- jpegs
- playford trust at the beginning (for SEO)
- meaningful
- conclude with the width in pixels.
For example an image of Dean Brown that is 600 pixels wide would be:
playford-trust-dean-brown-600.jpg
Step 2: Image settings
Selecting the correct image settings is critical for SEO, particularly if you remove or link images.
ONLY ENTER THE FOLLOWING OPTIONS
- URL(will be automatically created
- Title (will be autofilled)
ALWAYS
- Enter the Alt tag. This is the description of the image. For example an image of Dean Brown sitting in a chair would be ‘man sitting in chair’.
For example an image of Dean Brown that is 600 pixels wide would be:
playford-trust-dean-brown-600.jpg
NEVER
- Enter the Caption
OPTIONAL, but best avoided
- Description
Step 3: Image setting options when you insert your image
The following steps will insert an image at the top right of your text/module which is the default for this website. If you want the image elsewhere you can move the image to where you would like it, and change the settings (left/center/right) by clicking on the image.
- Insert your curser to the top left of the text (to just before the first letter of the text).
- Click on the Ädd Media” button. This will open the media library.
- Click on the image you want to insert.
- Complete the Alt text (as description) if you have not already done so.
- Select Alignment – Right
- Link to – none
- Size – Normally full size.
- Click on the Green “Ïnsert into page” button on the bottom right of the page.
When you have inserted all the images you want save the page as normal.